
With UltimatePOS we aim to make it “One in All” POS/Stock Management Application.
Selling price groups allow you to add different prices for a product.
- Sell at different prices: wholesale/retail
- Different prices for different locations.
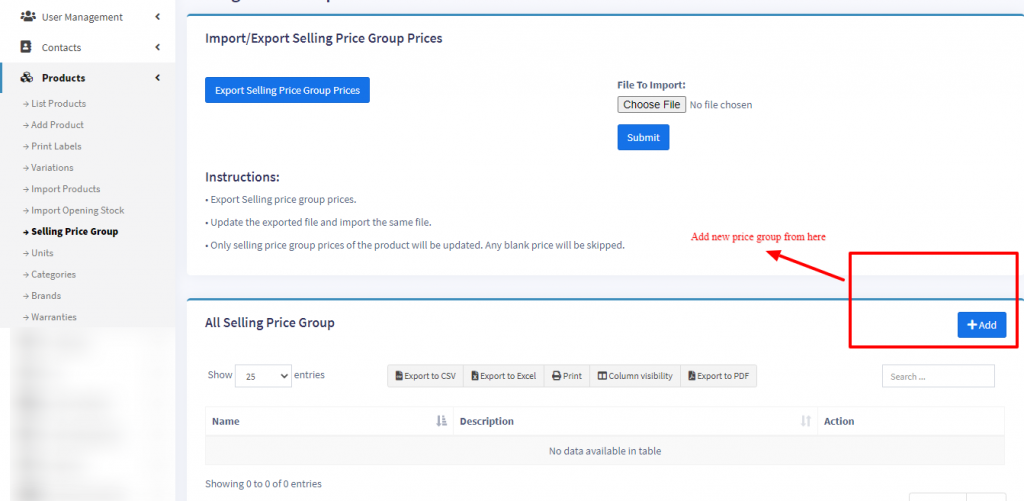
Adding Selling Price Groups:
- Go to products -> Selling Price Group
- Click on “Add” button to add a new price group. For example Retail price or WholeSale price or Bulk Purchase price or Location 1 price etc as per your wish.
- You can view a list of selling prices in “Selling Price Group” screen.
Adding Selling Price as either Fixed or Percentage:
The selling price can be given as a whole number (fixed) or in percentage.
Fixed: The value given will be the selling price for that group.
Percentage: The value given will be taken as a percentage, and that percentage of the actual selling price will be taken as the selling price for that group.
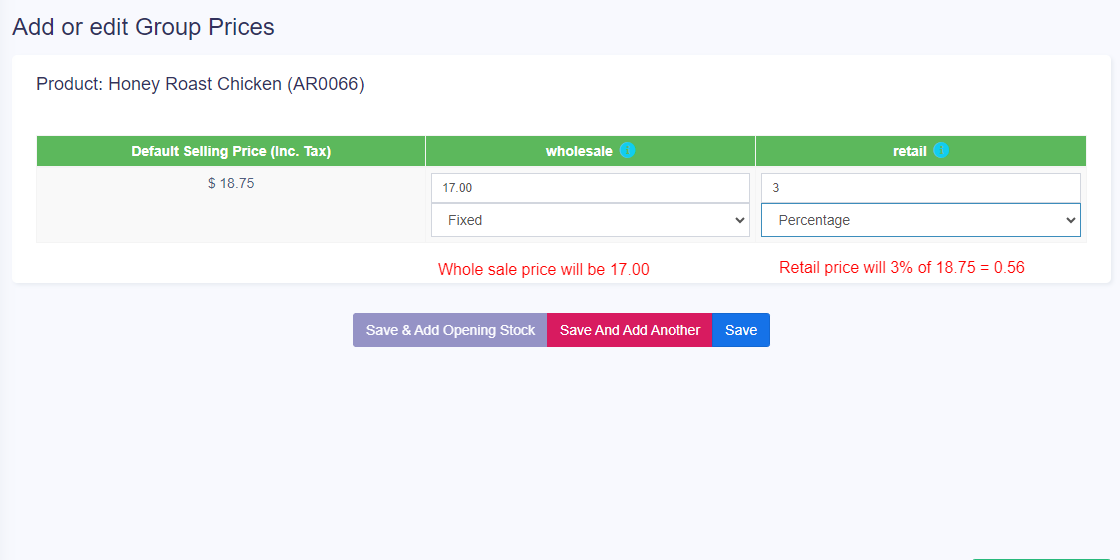
Adding price for different price groups:
- In Add/Edit product screen in the bottom, you will find the button “Save & Add Selling-price-group price”. Click on that button. Note: this button will not be visible if there are no selling price groups.
- In the next screen, you will see the list of the product name (if variable product then all variations), the default price & selling price groups price. Enter the prices for it.
- Click on Save.
Exporting & Importing selling price group:
- Go to Products -> Update Price.
- First, download the Excel file by clicking on the “Export Product Prices” button. There will be a separate column for group price.
- In the downloaded file change the price for the selling price group of the products.
- Only selling price group prices of the product will be updated, not the SKU or name.
- Any blank price will be skipped.
- Then import the file.
Selling at a particular price group:
- Go to POS.
- In the top, you will see the list of selling price groups. Select the one as per your requirement.
Note: This will not be visible if there are no selling price groups or if a user is assigned only one particular price group only. - Select the prie group & the selling prices for the product will be as per the price group.
Assigning a user to a particular price group:
- Sometime you may want to assign a particular or few selected price group to a user. In that case, create a role with the desired permission & price group assigned.
- You must assign at least one price group for a role if that role has permission to sell.
Assigning a customer to a particular price group:
- Customers can’t be directly assigned to the selling price group.
- You must assign the price group to the customer group that has the customer.
Assigning a price group to a Business Location
- Helps selling same product at a different price in different business location.
- Go to Add/Edit Business Location and select the
FAQ?
1. How to hide the Selling Price Group in POS window to all cashiers
In add/edit roles you can set which all selling price groups will be visible to that role. So in the cashier role, you can uncheck/remove permission for all other selling price groups except the one you want to show or use for the cashier.
Video Demonstration
📩 Still stuck? Contact Support