
Installing Multi-Purpose Form Generator
Server requirements
Make sure your server meets the following requirements:
- PHP >= 8.1 (Recommended: PHP version 8.1)
- OpenSSL PHP Extension
- PDO PHP Extension
- Mbstring PHP Extension
- Tokenizer PHP Extension
- XML PHP Extension
- cURL PHP Extension
- Zip PHP Extension
- GD PHP Extension
Server Recommendation
- Multi-Purpose Form Generator can be installed in Localhost.
- If you want to make it accessible online – We recommend using Cloud host – as it provides better flexibility or control of the server. You can use AWS or Digital Ocean or search for some others. Our demo site is set up on the Digital Ocean.
- You can also use Shared hosting. We also recommend using InMotion hosting, use this link to get an additional up to 40% discount. But you’re free to use any other which meets the server requirements.
STEPS For INSTALLING Multi-Purpose Form Generator
- After downloading, extract the file onto your desktop using a zip software (like WinZip or WinRAR or something else ).
- In case you want to install the system locally, here are the steps:
- 2.1 Download & Install a server like WAMP(for Windows) or XAMP(for Windows or Linux) or something else as per your preference having Apache or Nginx server.
- 2.2 Go to the htdocs folder. htdocs folder is commonly present inside the xamp/htdocs.
- 2.3 Copy the codebase folder (For example Form-Generator-CodeBase-V3.0) present inside the unzipped file in step 1.
- 2.4 Rename the folder to forms. (For example Form-Generator-CodeBase-V3.0 to forms)
- 2.5 Now open http://localhost/forms/public/install or http://localhost/forms/install
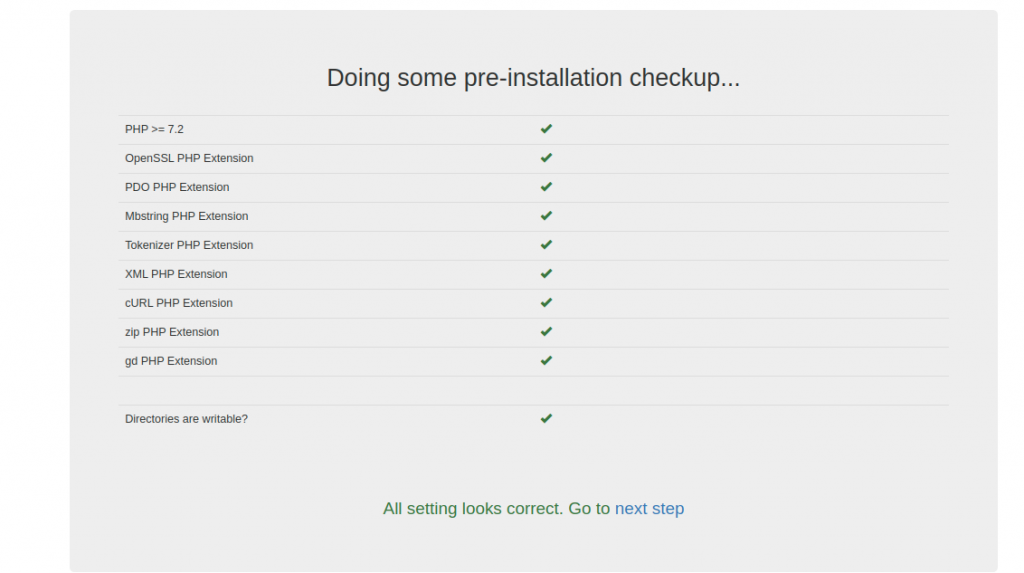
Here you will see a screen with “Doing some pre-installation checkup…” - 2.6 Make sure all checks are shows as Green-Tick. If there is something with Red-Cross then fix it and refresh the page to check again. After all Green-Tick click on “Go to Next Step”
- If it shows a 404 error go to http://your-website.com/forms/public/index.php/install-start .
- 2.7 Follow the installation instructions as displayed on the screen.
- 2.8 After all installation is done, Go inside the public folder and delete the install folder present.
- In case you want to install the system in hosting, here are the steps:
- 3.0 Make sure the URL of the application is like www.yourwebsite.com or subdomain.yourwebsite.com for a better experience. Installing in folders like www.yourwebsite.com/any-folder-name/forms is not recommended.
- 3.1 Upload the extracted zip file (all files & folders inside Form-Generator-CodeBase-V3.0) in the server document root.
- Upload it directly by logging into your cPanel (or direct admin) & going to file manager.
- Or you can use FTP client like Filezilla (https://filezilla-project.org/)
- 3.3 Open your website http://your-website.com/public/install or http://your-website.com/install
- 3.4 Make sure all shows a Green-Tick. If there is something with Red-Cross then fix it and refresh the page to check again. After all Green-Tick click on “Go to Next Step”
- 3.5 Follow the installation instructions as displayed on the screen.
- 3.6 You will see the installation page as given below or if shows some error then check debugging error notes given below.
- 3.7 After all installation is done, Go inside the public folder and delete the install folder present.
- “Doing some pre-installation checkup.” Screen: Make sure all are marked with Green-Tick then click on “Next Step”
On clicking “Next Step” it will go to the Installation screen as shown below in step 5.
Not Found Error: If it shows a not found error after clicking on the “Next Step” link then try changing the link as below:
– www.yourwebsite.com/public/install-start
– www.yourwebsite.com/public/index.php/install-start
(to remove index.php from the URL make sure you have mod_rewrite enabled, contact your hosting for more details) - Installation screen:
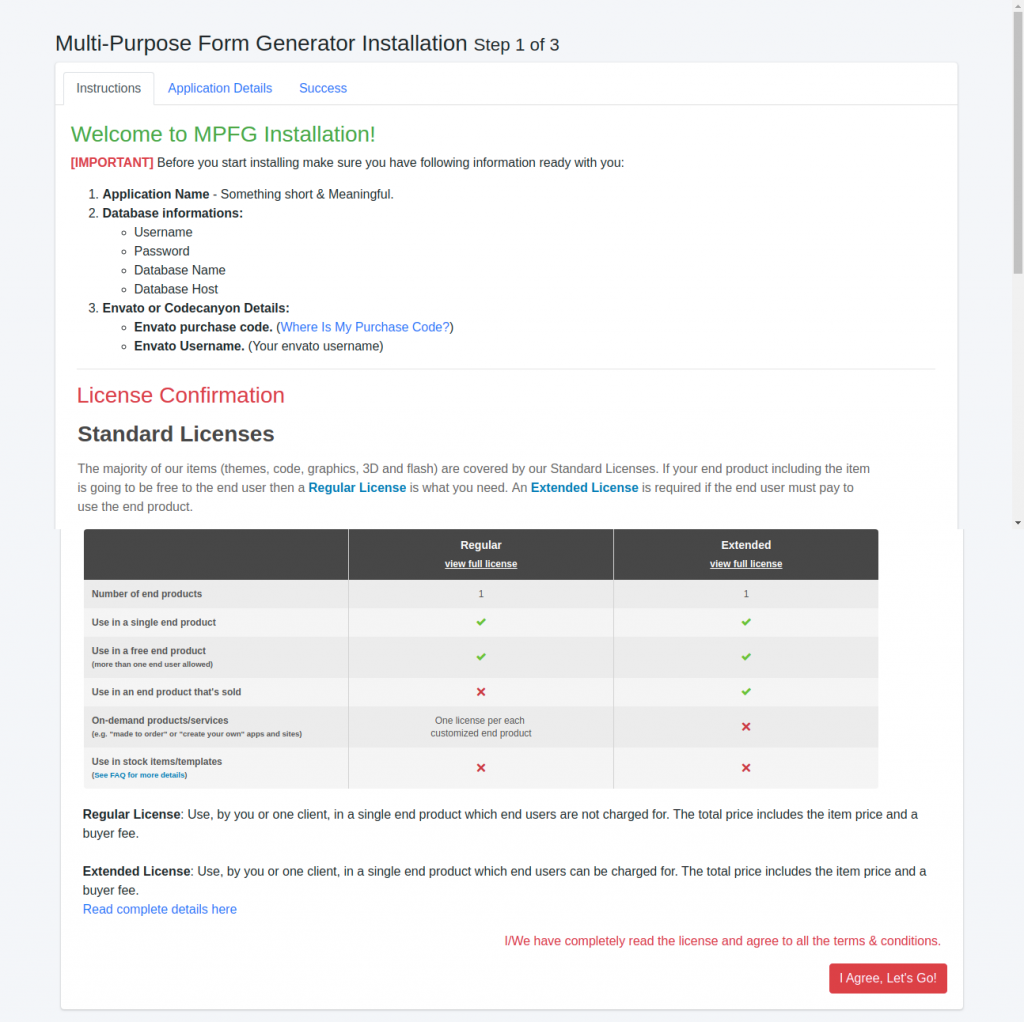
Read the instructions. it says to keep all your information ready for the next steps, like database details, email configuration, Envato purchase code . - Fill this form with all details & click on “Install”
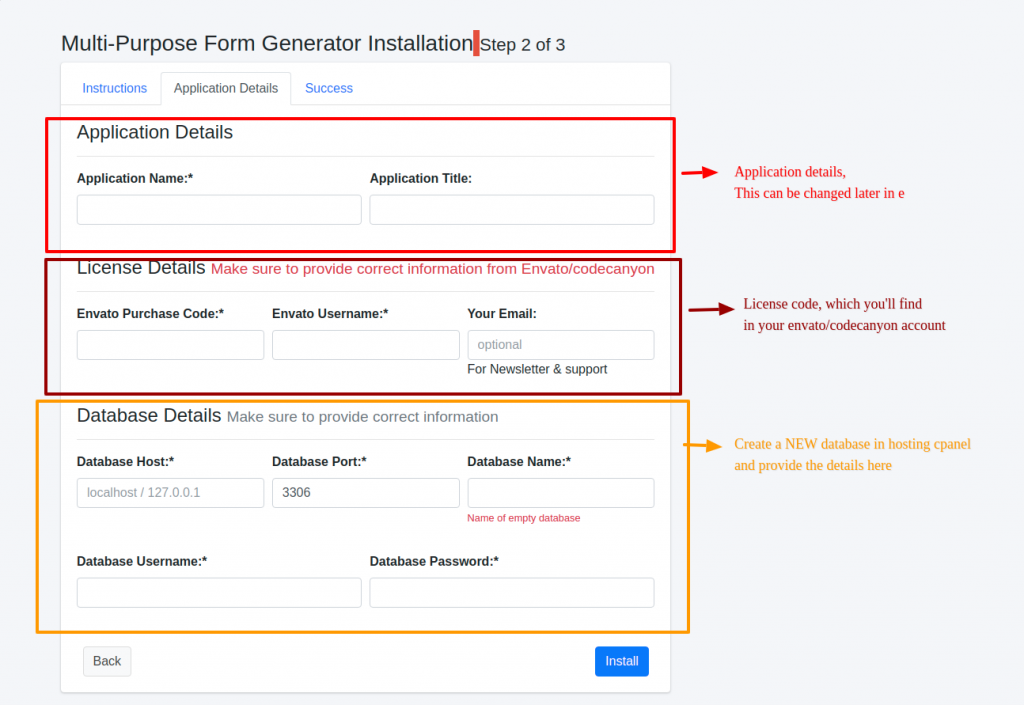
- After clicking on “Install” if all details are correct it will go to the next step. If it shows an invalid purchase code then refer to this guide.
“You must type a file name” Error in windows: Check the steps mentioned at the end with heading – (creating a hidden file in windows) - Click on “Install” after this and wait for a few minutes to process (1 to 10 minutes depending on hosting)
- It will display an install success screen with the default login details.
Debugging Errors:
While installing there can be some errors because of a few reasons, check the below & fix them accordingly.
- Syntax Error: If it shows a syntax error then make sure you have PHP version as mentioned in server requirement section above
- 500 Internal Server error: This can happen if the server is not configured properly. Check your server Log and fix it accordingly.
- If it shows SoftException in Application.cpp:651: Directory “/installed-directory/public” is writeable by group, referer: http://your-website.com, then go to the public folder and make its permission as 755
- If it shows SoftException in Application.cpp:651: Directory “/installed-directory/public/index.php” is writeable by group, referer: http://your-website.com, then go to the public/index.php folder and make its permission as 755
Note:
- After successful installation, if you visit www.yourwebsite.com/install, you will get an error page. If you want to change any further details like the database, database name, host, database password; you can do it by changing in .env file present inside codebase.
In Windows when you try to create .env file it shows an error – “You must type a file name”
To overcome this error enter the name of the file as .env. (notice a “.” at the end of the name) and it will work.
In the File Explorer, call your file .env. and it will remove the ending ‘.’