Table of Contents
- 1 Comprehensive Guide to Software for Mobile, Laptop, Electronics Repair Service Center
Comprehensive Guide to Software for Mobile, Laptop, Electronics Repair Service Center
In today’s digital age, an efficient repair management system is crucial for any electronics repair service center. This blog explores the advanced repair module for UltimatePOS, showcasing how it can streamline operations for mobile, laptop, and other electronics repair services.
Introduction to UltimatePOS Repair Module
The UltimatePOS Repair Module is designed to enhance the efficiency of repair management in service centers. This module caters to various electronic devices, including mobile phones, laptops, and desktops. By streamlining processes, it allows technicians to focus on what they do best—repairing devices.
Features of the Repair Module
The repair module is packed with features that facilitate a smooth workflow. It offers functionalities such as:
- Comprehensive repair tracking from initiation to completion.
- Customizable repair statuses to suit different service needs.
- Ability to manage multiple brands and devices under one roof.
- Intuitive user interface that simplifies navigation.
Logging into the Repair Module
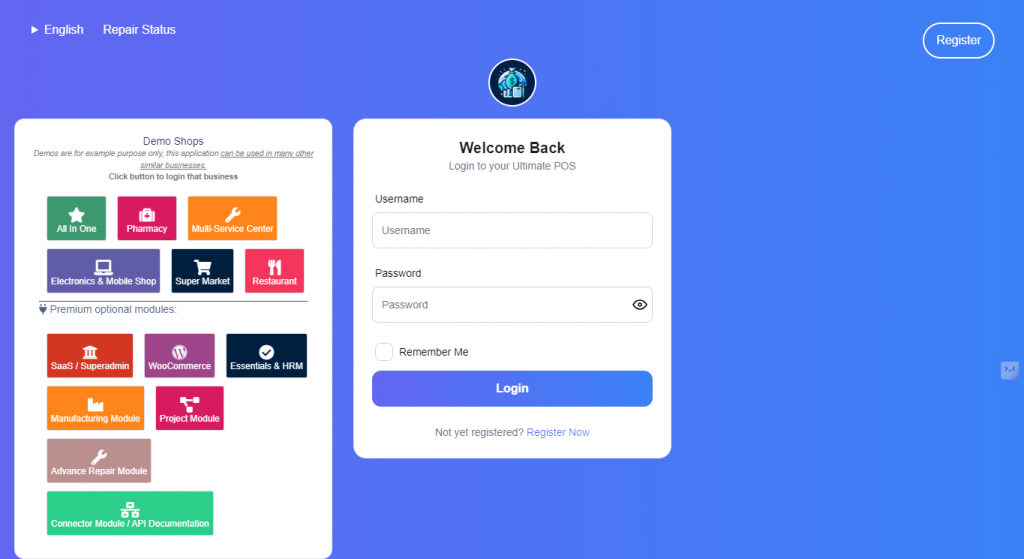
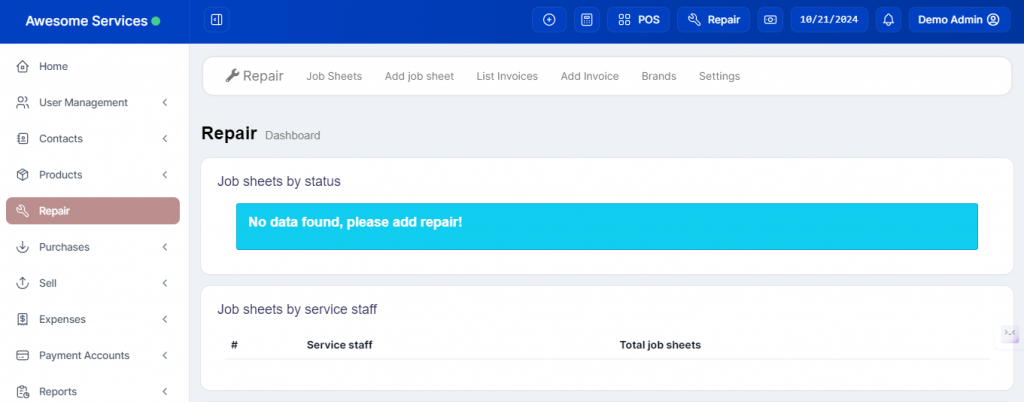
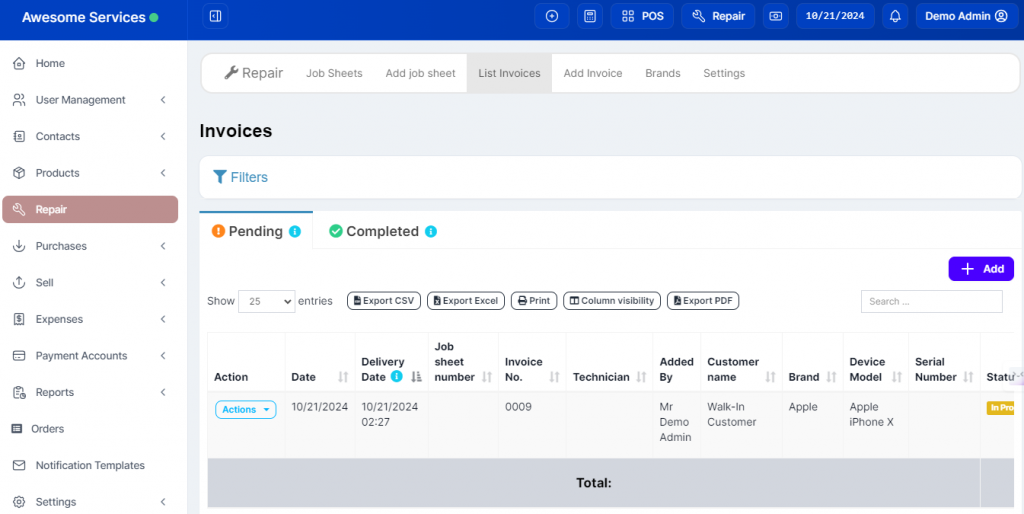
Accessing the repair module is straightforward. Users simply log in using their credentials, after which they will be directed to the main dashboard. This dashboard is equipped with a repair menu on the left-hand side, providing quick access to various submenus.
Once logged in, users will find a well-organized repair menu. This menu includes options such as:
- List
- Brands
- Settings
This structure allows users to efficiently manage their tasks without confusion.
Adding and Managing Repair Brands
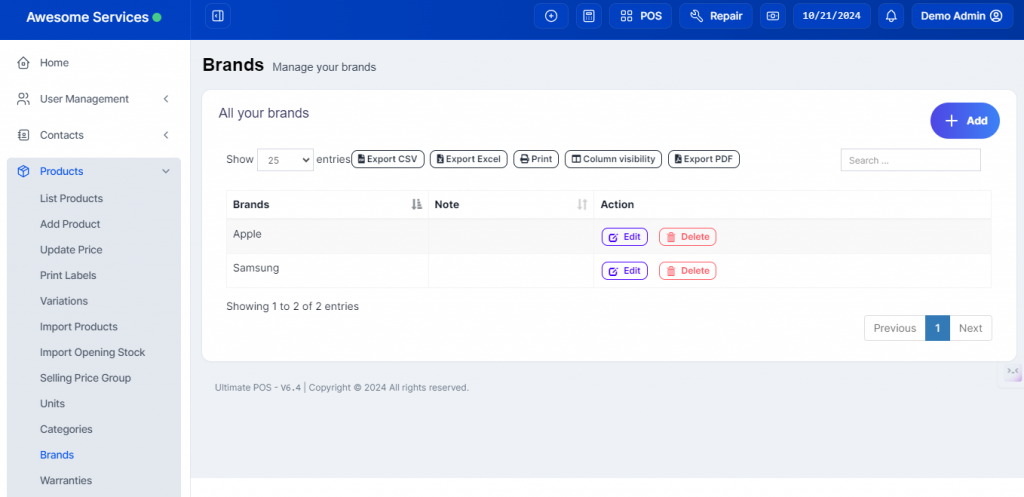
In the repair module, users can add multiple brands for which they provide repair services. For instance, brands like Apple, Dell, and Samsung can be managed easily. Users simply click on the add option, input the new brand details, and save.
Setting Up Repair Statuses
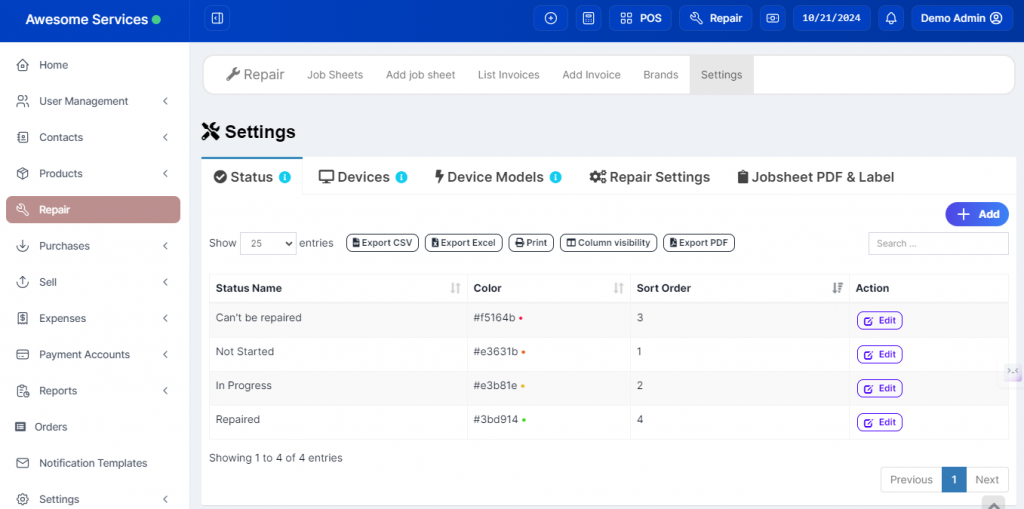
Customizing repair statuses is essential for tracking progress. The module allows users to define various statuses such as:
- Can’t be repaired
- In progress
- Not started
- Waiting for repair parts
Users can also create new statuses and assign color codes for better visibility.
Adding Devices for Repair
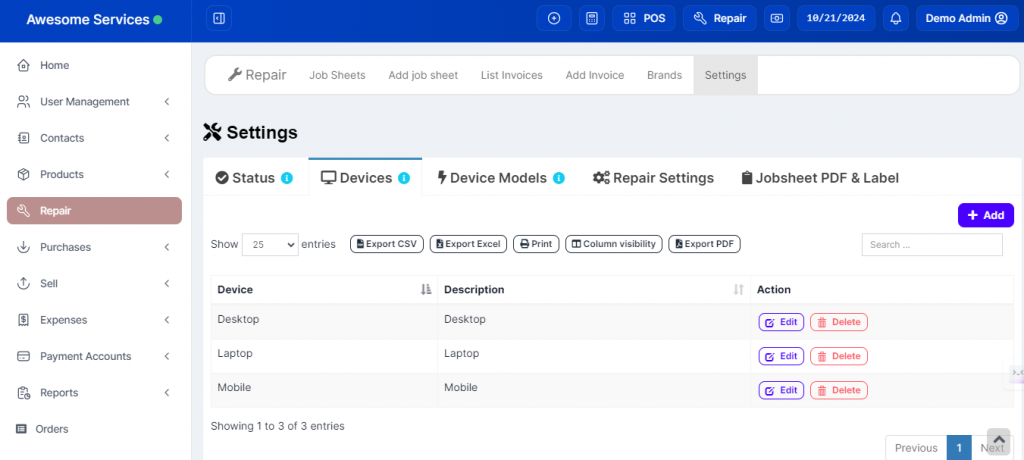
The module supports the addition of various devices for repair services. Users can input details for devices such as desktops, laptops, mobiles, and even televisions. This flexibility ensures that service centers can cater to a wide range of repairs.
Creating Device Models and Checklists
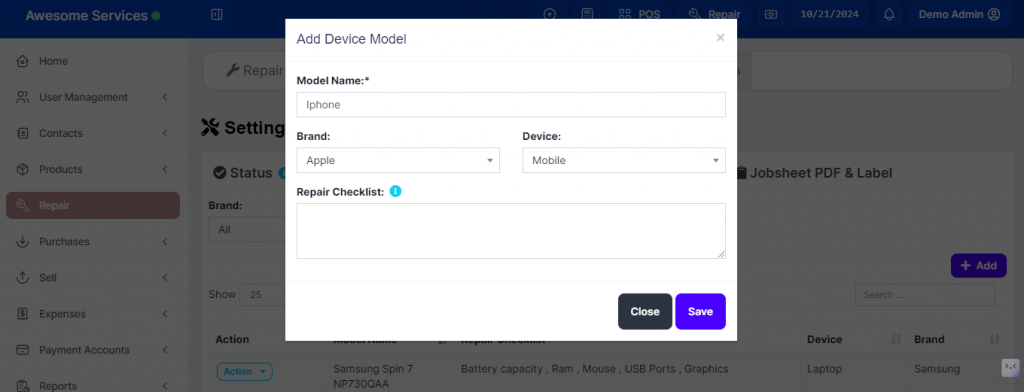
For each device, users can create specific models and checklists. These checklists serve as a guideline for technicians, ensuring that every essential component is inspected before accepting a repair. For instance, a checklist for a mobile device might include:
- Battery condition
- Screen Functionality
- Camera performance
Repair Settings and Default Statuses
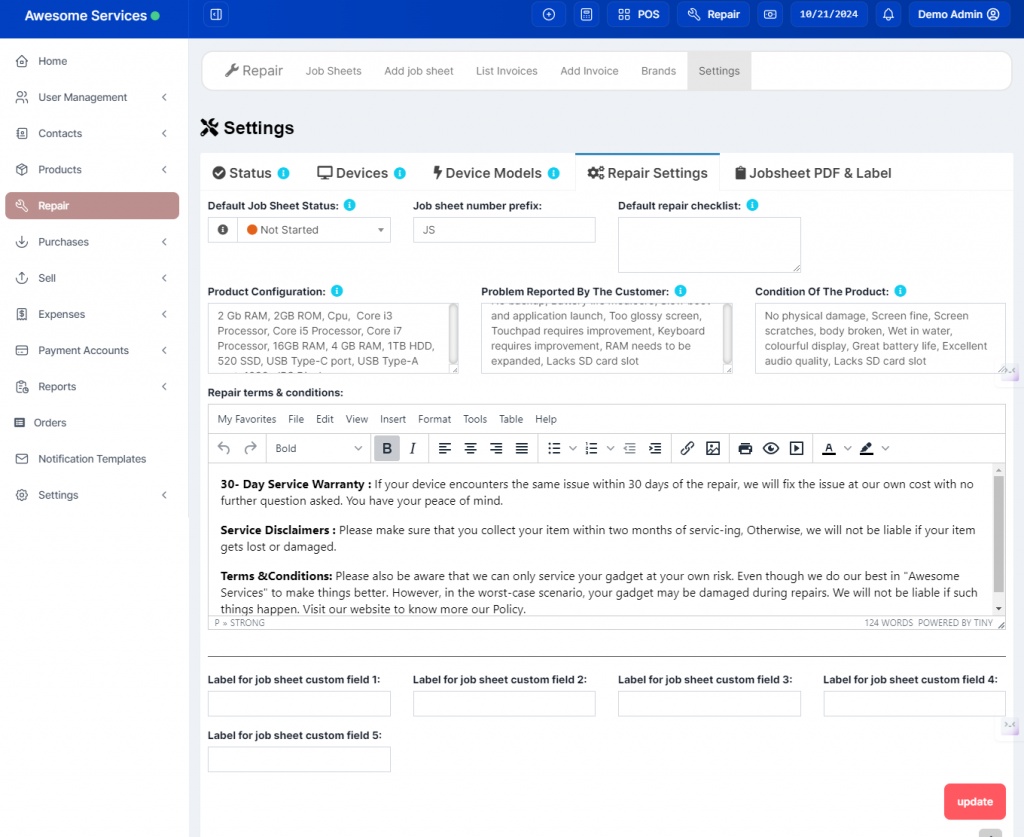
In the repair settings section, users can configure default statuses for new repairs. This feature simplifies the process by automatically assigning a predefined status when a repair is initiated. Typically, the default status is set to ‘Not started’, which can be adjusted based on user preference.
Adding a New Repair
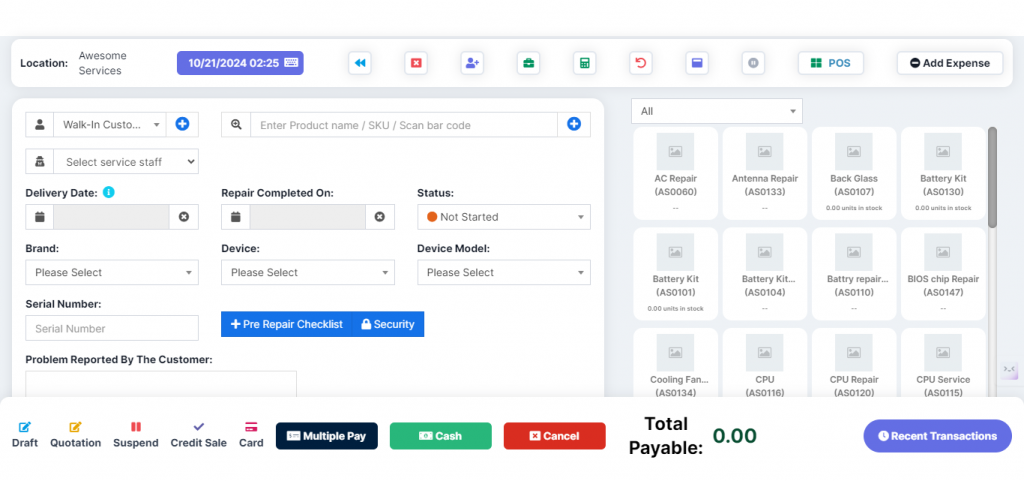
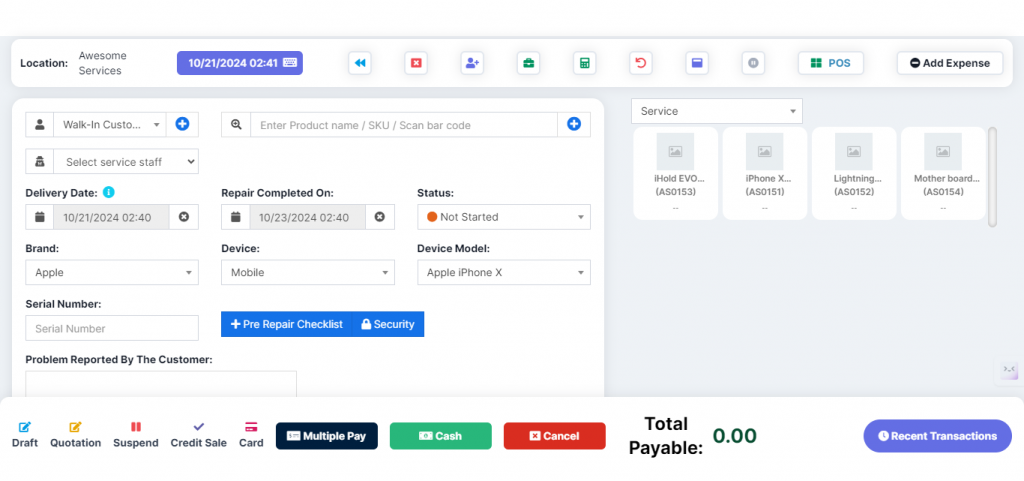
To initiate a repair, users can easily navigate to the ‘Add Repair’ section. Here, you will fill out essential details, including the technician’s name, repair due date, and the status of the repair. This simple interface ensures that all relevant information is captured efficiently.
Steps to Add a New Repair:
- Select the technician responsible for the repair.
- Choose the repair due date.
- Set the default status (usually ‘Not started’).
- Specify the brand and device type.
- Enter the device model and serial number.
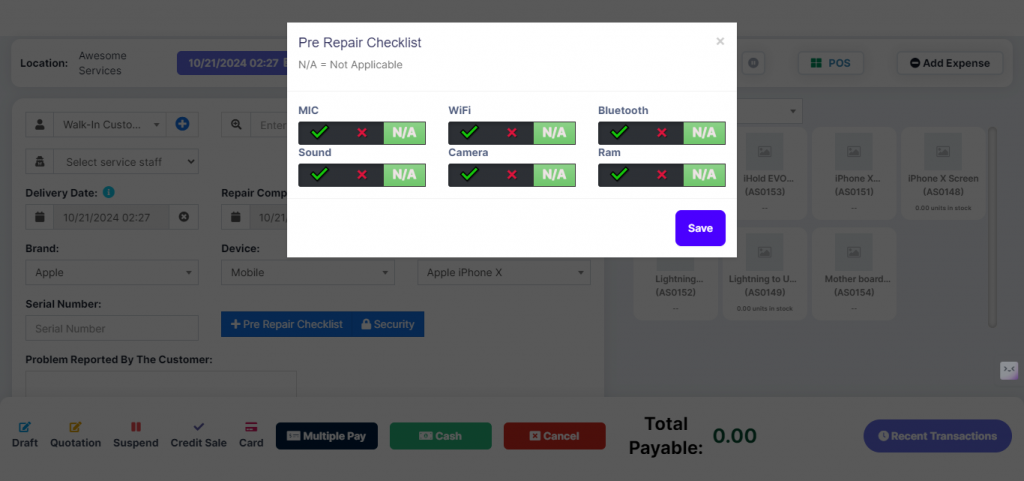
- Complete the pre-repair checklist to ensure all necessary checks are performed.
Pre-Repair Checklist and Invoice Generation
Before accepting a repair, it’s crucial to conduct a thorough pre-repair checklist. This checklist not only enhances the quality of service but also provides a clear record of the device’s condition prior to repair.
Why a Pre-Repair Checklist is Important:
- Ensures all components are functioning before repair.
- Helps in documenting the initial state of the device.
- Facilitates better communication with the customer regarding issues found.
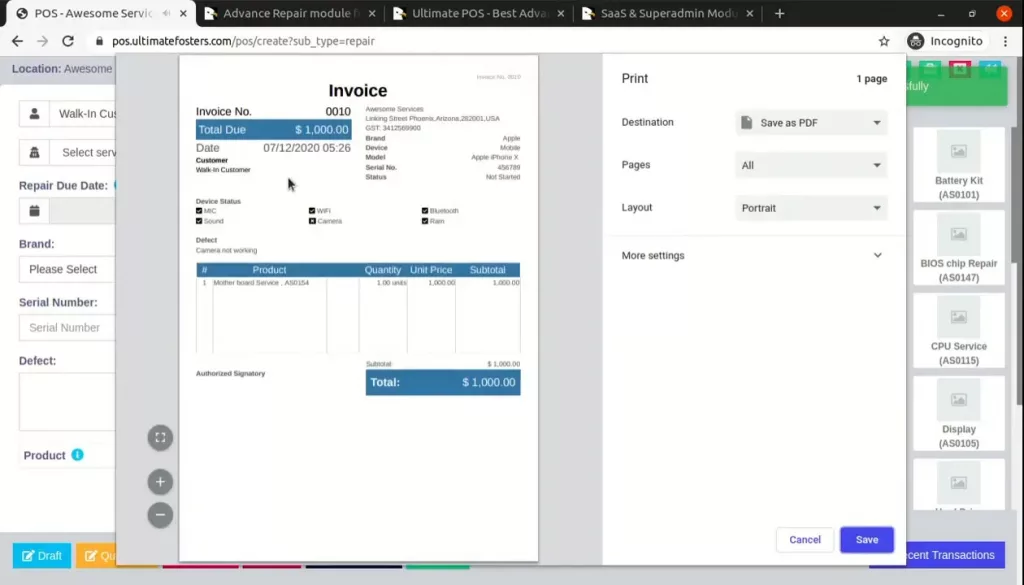
Upon completion of the repair process, an invoice can be generated, detailing the services rendered and the device’s condition. This invoice serves as a formal record for both the service center and the customer.
Customizing Invoice Layout
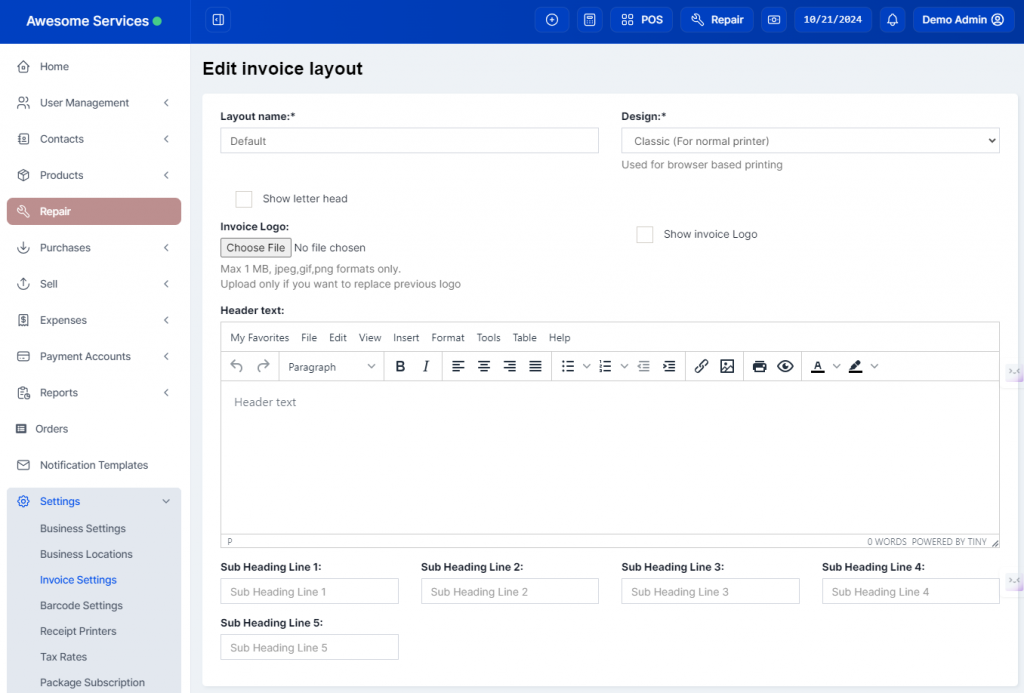
Customization of the invoice layout is a significant feature that enhances the presentation of repair services. Users can modify various elements of the invoice to include specific details that are relevant to their operations.
Key Customization Options:
- Add or remove sections such as brand, model, defect, and checklist.
- Change the labels of the sections to better fit your business terminology.
- Ensure that the invoice reflects all necessary information accurately for customer clarity.
Once customized, these invoices can be printed and provided to customers, enhancing professionalism and customer satisfaction.
Viewing and Updating Repair Status
Tracking the status of repairs is essential for maintaining an organized workflow. UltimatePOS allows users to view and update repair statuses easily.
How to Update Repair Status:
- Navigate to the list of repairs.
- Select the specific repair you wish to update.
- Change the status from ‘Not Started’ to ‘In Progress’ or any other relevant status.
- Optionally, notify the customer via SMS about the status change.
This feature ensures that both technicians and customers are kept informed about the progress of repairs, fostering transparency and trust.
Adding Service Staff
Efficient management of service staff is critical in a repair service center. Users can add new technicians who will be responsible for repairs, ensuring that the right skills are assigned to each task.
Steps to Add Service Staff:
- Go to the ‘Edit Role’ section.
- Select ‘Service Staff’ as the user type.
- Fill in the required fields, including username and password.
- Assign the appropriate permissions and roles for the technician.
- Click ‘Save’ to finalize the addition.
This process is straightforward and ensures that your team is well-equipped to handle repairs efficiently.
Linking Products and Services to Device Models
Linking products and services to specific device models is vital for ensuring that the right components are available for repairs. This feature allows service centers to maintain an organized inventory that is easily accessible.
How to Link Products and Services:
- Select the brand and device type.
- Choose the specific device model.
- Add relevant products or services associated with that model.
- Enable ‘Manage Stock’ if the item is a product; leave it unchecked for services.
This linking capability streamlines the repair process, ensuring that technicians have immediate access to necessary parts and services.
Future Features and Conclusion
The UltimatePOS repair module is continuously evolving, with new features aimed at enhancing user experience and operational efficiency. Upcoming features include:
- Printing of job sheets related to repairs.
- SMS templates for sending updates to customers.
- Enhanced reporting tools for better tracking of repair metrics.
These enhancements will further solidify UltimatePOS as the go-to software for mobile, laptop, and electronics repair service centers.
FAQs
As you explore the UltimatePOS repair module, you may have some questions. Here are a few frequently asked questions:
- Can I customize the repair statuses?
Yes, users can add or modify repair statuses to fit their operational needs.
- Is there a limit to the number of devices I can add?
No, you can add as many devices as your service center requires.
- How do I contact support for help?
You can reach out to our support team for assistance with any queries.
This comprehensive guide highlights the extensive capabilities of the UltimatePOS repair module, empowering your service center to operate more efficiently.




Leave A Comment